搜索...
Language
——  Inspection equipment  ——
Features:
1. Burr measurement.
2. 2.Product bending angle (inner R) measurement → Determine whether the mold design is appropriate.
3. Size measurement.

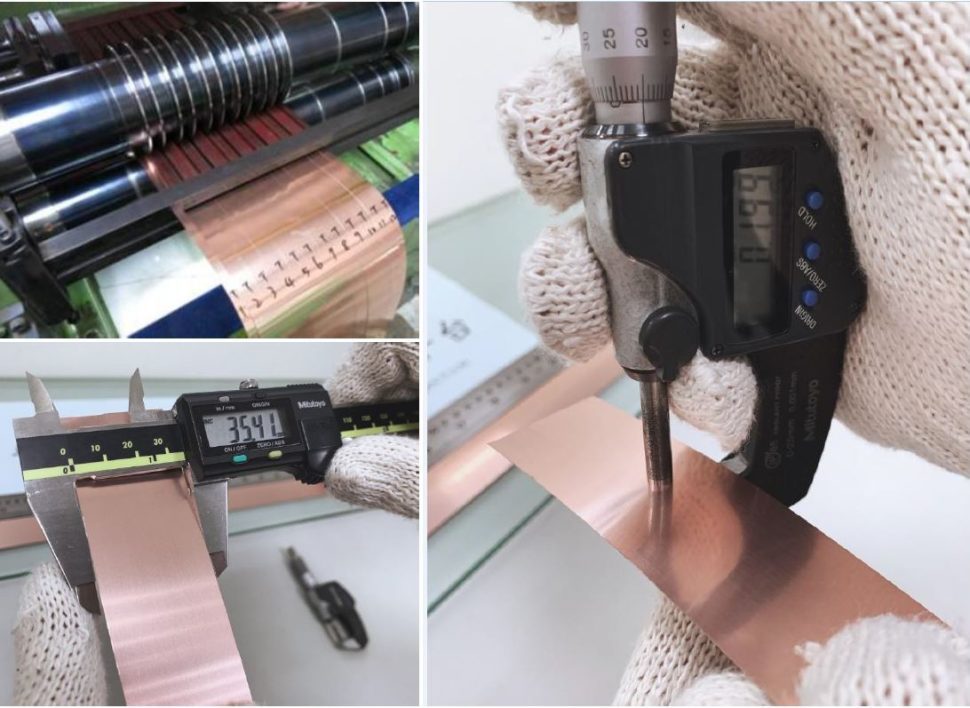
Size inspection for width and thickness

Professional inspection machine

Able to confirm the material quality (preliminarily ensuring the material properties) including material appearance, width, flatness, bending, and burrs before cutting the masterbatch.

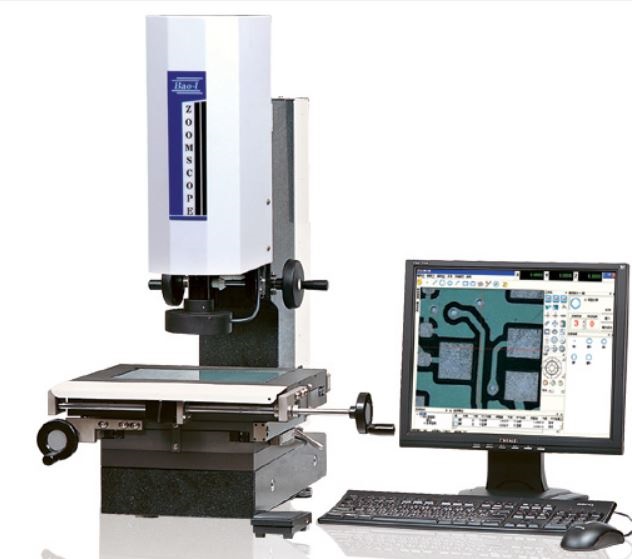
2.5D image measuring instrument

  • Causes of burrs → Poor mold clearance control, different ductility of materials, and different sharpness of molds.
  • Burr measurement: We use 2.5D image measurement instrument.
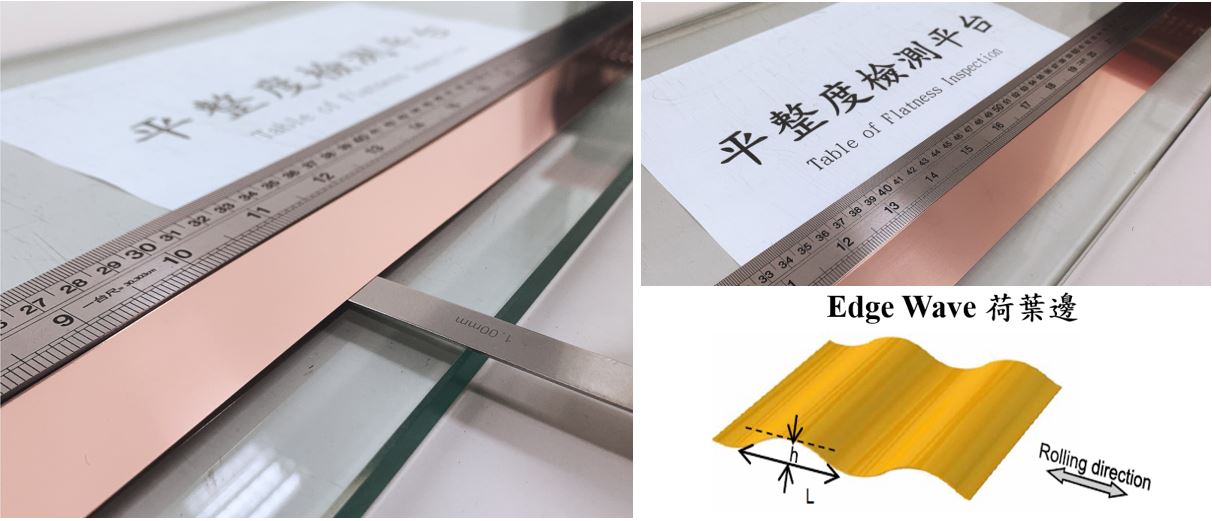
  • Causes of poor flatness (cause of waves) → Improper control of the rolling process (causing uneven stress).
  • Solution: Eliminate tension or stretch and straighten.
  • After cutting, the thickness gauge will measure the height of the distance between the platform and the materials.
  • International standard: Not exceeding 2mm/1 meter (i.e. distance between 1-meter sample and platform < 2mm).
  • Burr inspection

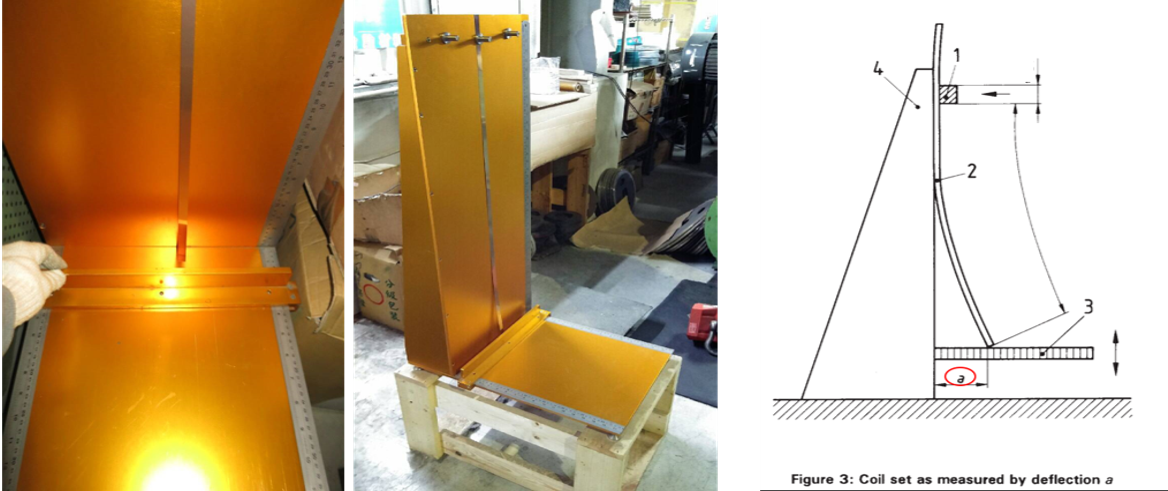
    Warpage inspection platform

    Flatness inspection
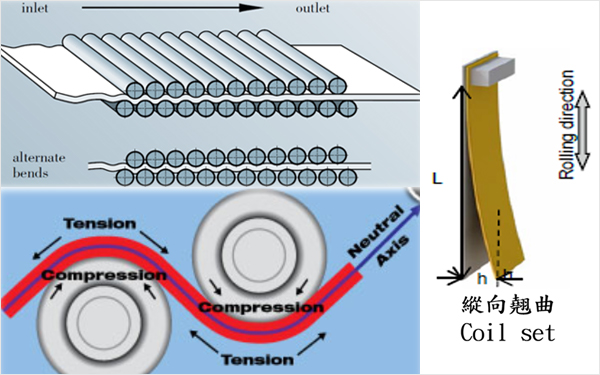
  • Causes of warpage → Excessive residual stress when rolling the materials.
  • Solution: Low-temperature tempering or bending straighten.
  • Warpage inspection

    International standards: Not exceeding 80mm/1 meter (i.e. the a of 1-meter sample < 80mm).
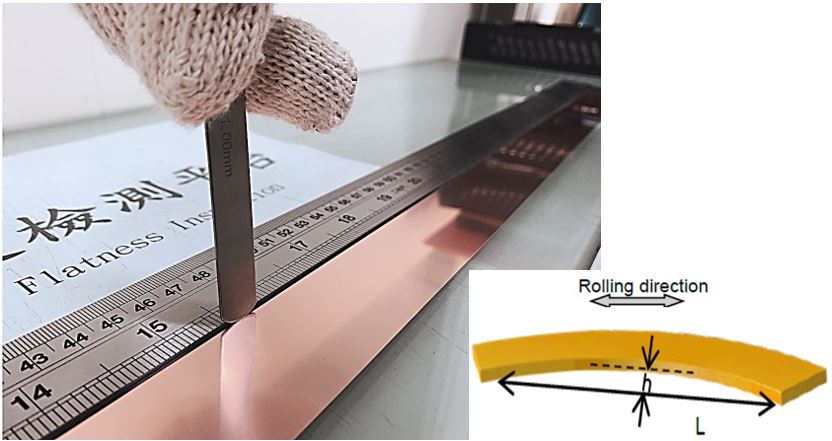
  • Use a thickness gauge to measure the distance between the material and the iron ruler.
  • Causes of poor curvature → The material has wavy edges, and the thickness is uneven.
  • International standards: Not exceeding 3mm/1 meter (i.e. gap h of 1-meter long sample < 3mm).
  • Curvature inspection

    Versatile tensile testing machine
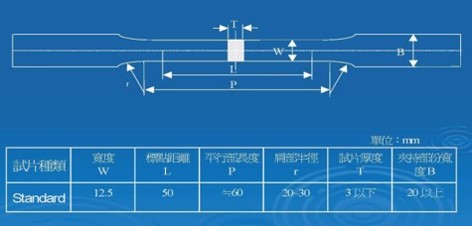
  • The size of the test sample is displayed in the figure.
  • The thickness is less than 3mm based on ASTM E8 metal material tensile test method.
  • Test 4 properties→Tensile strength (TS), yield strength (YS), elongation (EL), and elasticity coefficient (E).
  • Versatile tensile testing machine - Test sample

  • The higher the tensile strength (TS) → the better the test results of durability (service life).
  • ∵ Fatigue strength is directly proportional to tensile strength.
  • The higher the yielding strength (YS) → The greater the normal force if the snap dome has a large downward pressing stroke and no yielding.
  • The higher the elastic coefficient (E) → The greater the normal force if the snap dome's downward stroke is small and not yielding.
  • The higher the elongation (EL%) → The higher the height of draw extrusion.
  • The major reasons for the difference from the results of the tensile test:
    a. The material size conforms to the international standards or not b. The existence of burrs on test sample c. The test sample is clamped firmly or not;
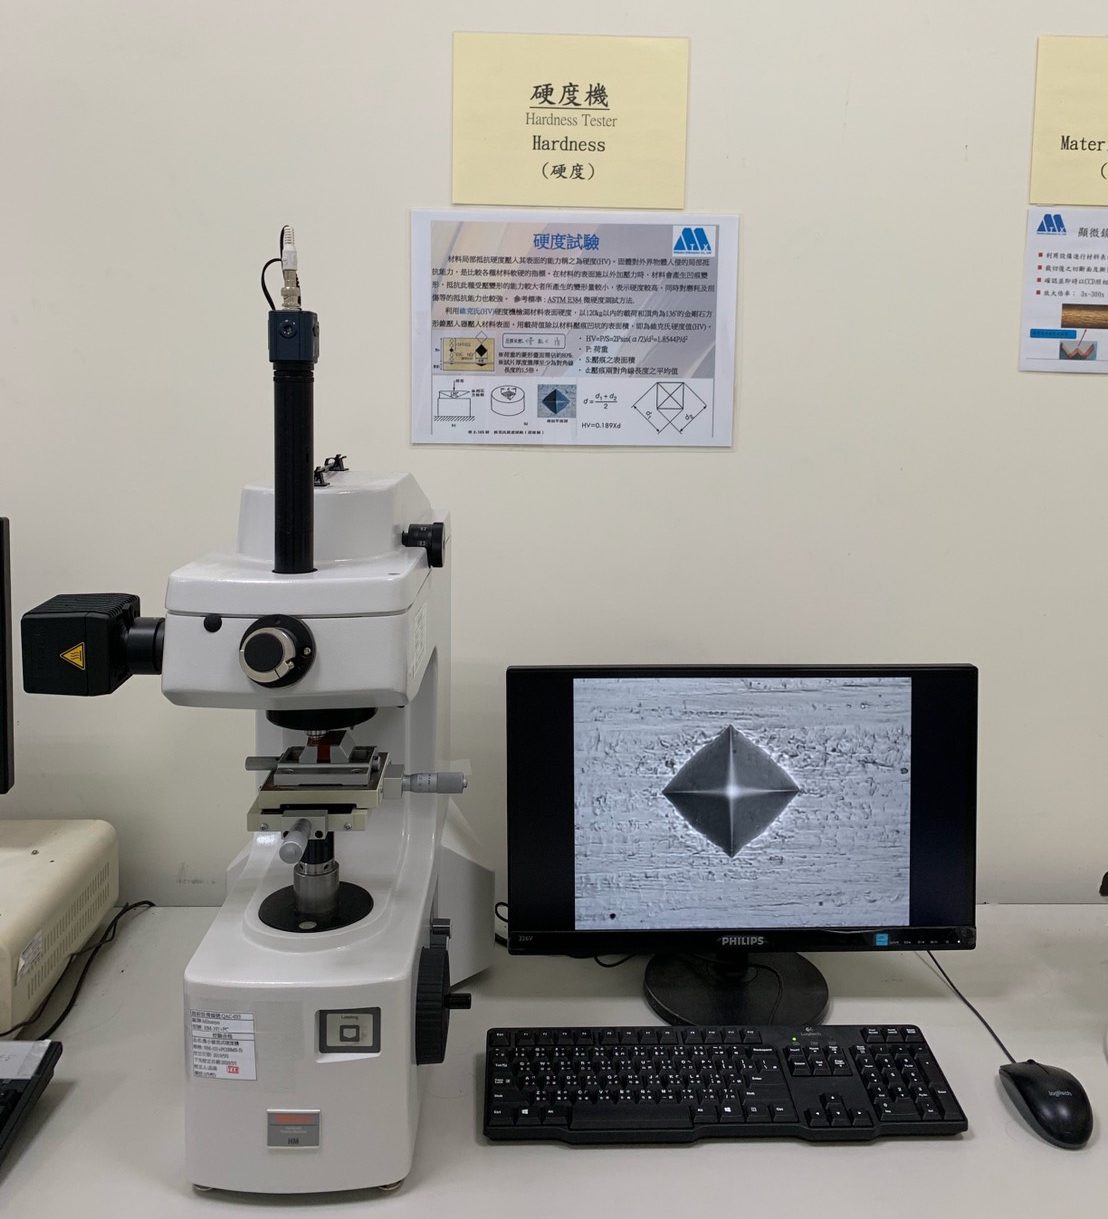
  • The major reasons for the difference in hardness tests:
  •      A.Flatness of the test sample itself.
         B.Appropriateness of the pressing load.
         C.Symmetry of cross symmetry line.
  • Use the load test of 300g-500g for a test time of 10-15 seconds based on ASTM E3 microhardness (HV) test method.
  • 90-degree bending test

  • Able to understand the damage resistance of materials during forming.
  • Place the sample in a W-shaped mold for W-shape (90 degrees), G/W and B/W bending tests.
  • We can test the inner radius R of the mold: The minimum R = 0.05mm, the maximum R = 1.5mm.
  • W-shaped bending stretches and deforms outward at the bended point. When being compared with the V-shaped bending test method, W-shaped bending is more stringent.
  • Manual stamping machine (90-degree bending test)

  • R: Inner radius of the bended point
  • t: material thickness (mm)
  • Use the microscope to check whether there are cracks on the exterior side of the bended point.
  • The smaller the (R/t) value, the better the bending formability.
  • Hardness testing machine

  • Use equipment to observe cracks on material surface and bending.
  • Observe the cut and tear surfaces after cutting.
  • Confirm and record using CCD camera in a real-time manner.
  • Magnification: 3-300x.
  • High-magnification microscopes

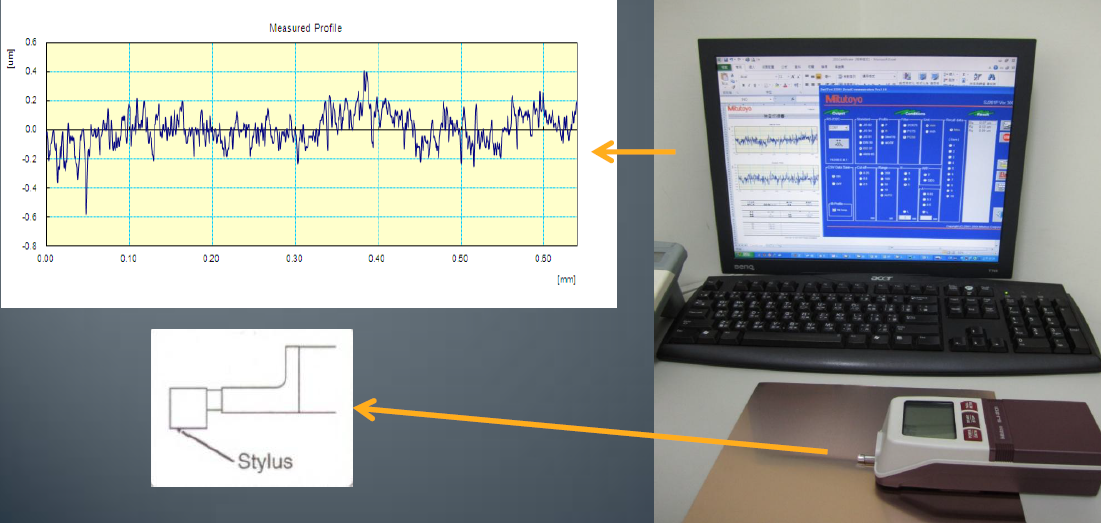
  • Smaller Ra → Longer service life of mold→ Larger connector contact area, which could mitigate the temperature rise.
  • ◆To mitigate temperature rise, increase electrical conductivity, thermal conductivity, and contact area
  • Surface roughness meter

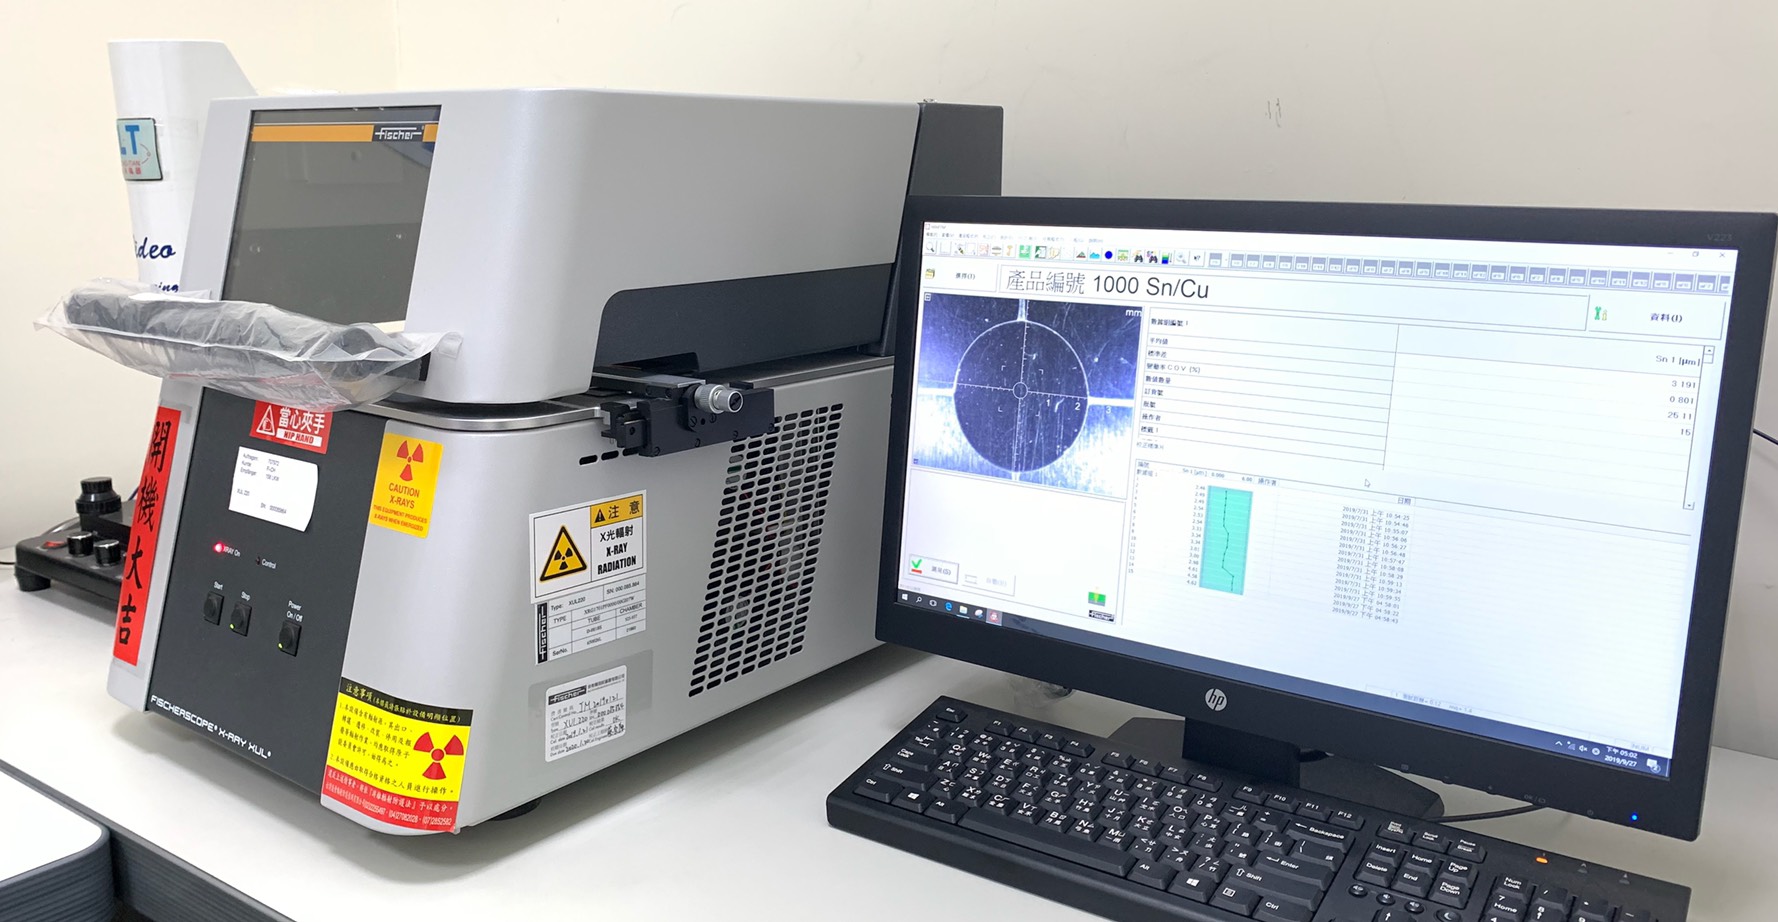
    X-RAY electroplating film thickness composition analyzer

  • We use X-ray fluorescent coating thickness measurement and material analyzer for non-destructive measurement of coating thickness and analysis of material composition.
  • Simultaneous measurement for up to 24 kinds of elements ranging from chlorine (17) to uranium (92).
  • Allowable tolerance range: ±5% for film thickness detection and ±5% for composition detection.
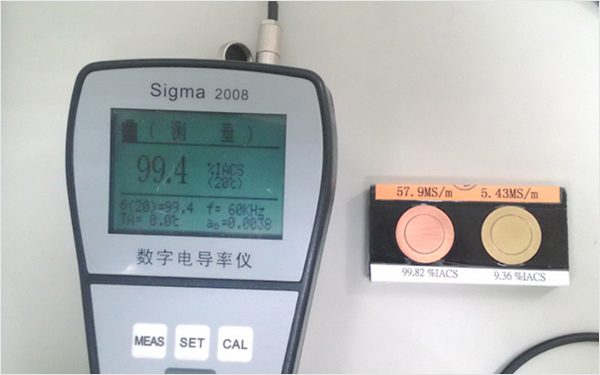
  • Apply the principle of vortex testing to measure the conductivity of metal. The conductivity measurement unit is integrated as %IACS.
  • High conductivity is able to mitigate temperature rise and contact resistance.
  • Conductivity inspection machine

  • Confirm the sample size after the slitting of the materials.
  • 2.Use the micrometer to confirm whether the thickness of the material meets the customer's shipment standards.
  • 3.Use the vernier caliper to confirm whether the material width meets the customer's shipment standards.
    • Contact:0769-8390-5768
    • Email:alex@metalex.com.tw
    • ADD:1st Floor, Building 2, Runfeng Zhigu, No. 3 Sima Gongye 1st Road, Changping Town, Dongguan City, Guangdong Province
    Copyright © 2014-2017 Dongguan Metalexpert Enterprise ICPFiling number180006020-3 Provided by Ocean NetworkWebsite construction  Google SITEMAP | BAIDU SITEMAP

    Dongguan Metalexpert Enterprise

    Metalex Enterprise Co., Ltd.